

This guide will detail how to integrate the Triton Sync Cloud Platform with AXIS Camera Station to unify alerts and event logging.
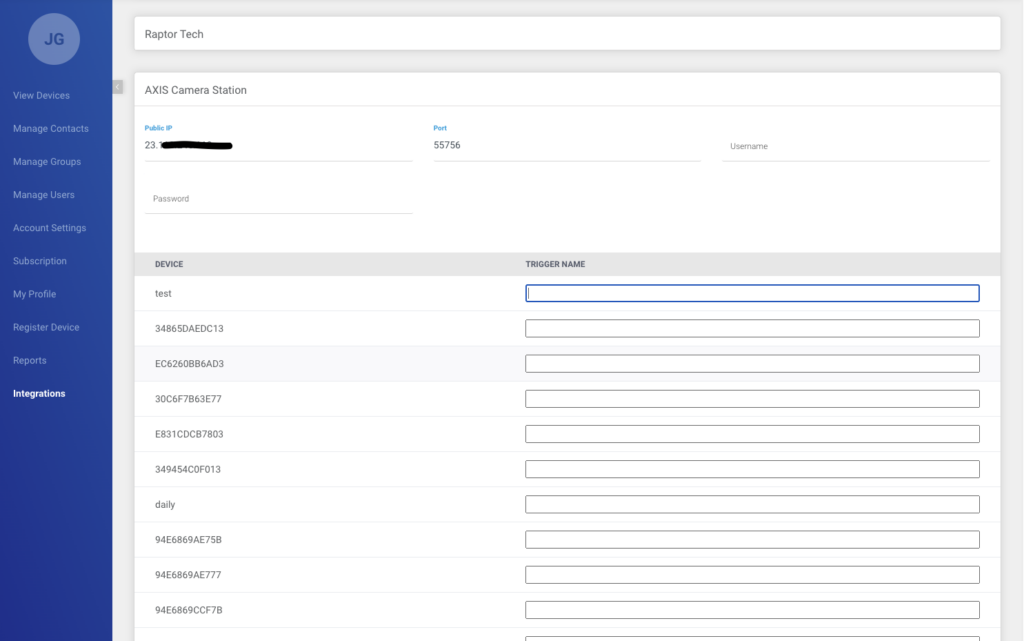
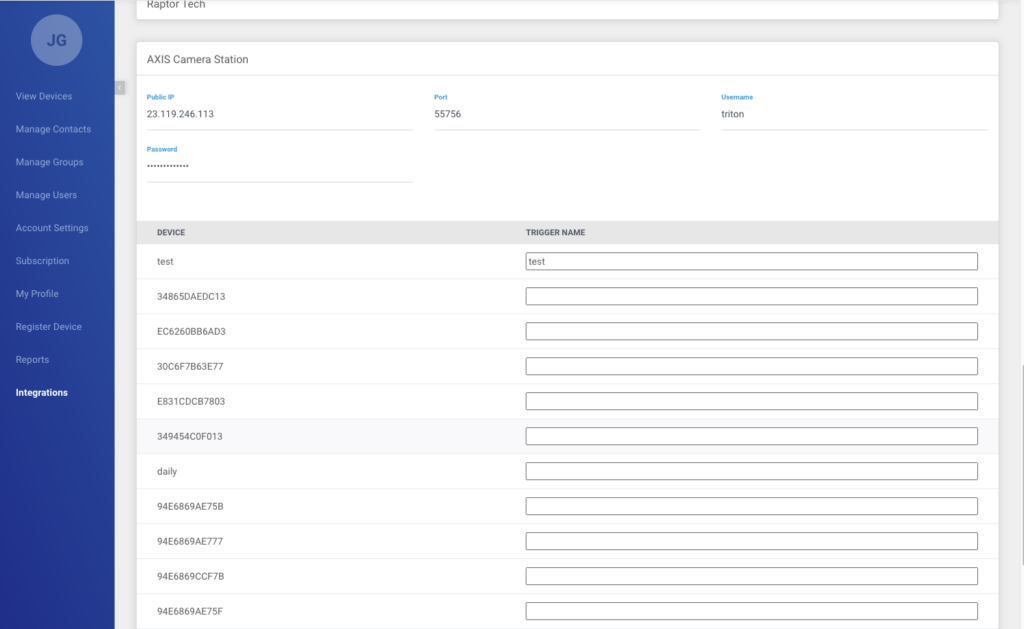
Step 1: Check the public IP of the computer that AXIS Camera Station is running
on whatismyip.com and copy the listed public IPv4 address. If you did not
change the default port for mobile communications on the AXIS Service Manager, enter
55756 as the port and the public IPv4 address into the corresponding fields on the Triton
Sync Dashboard under the Integrations tab.
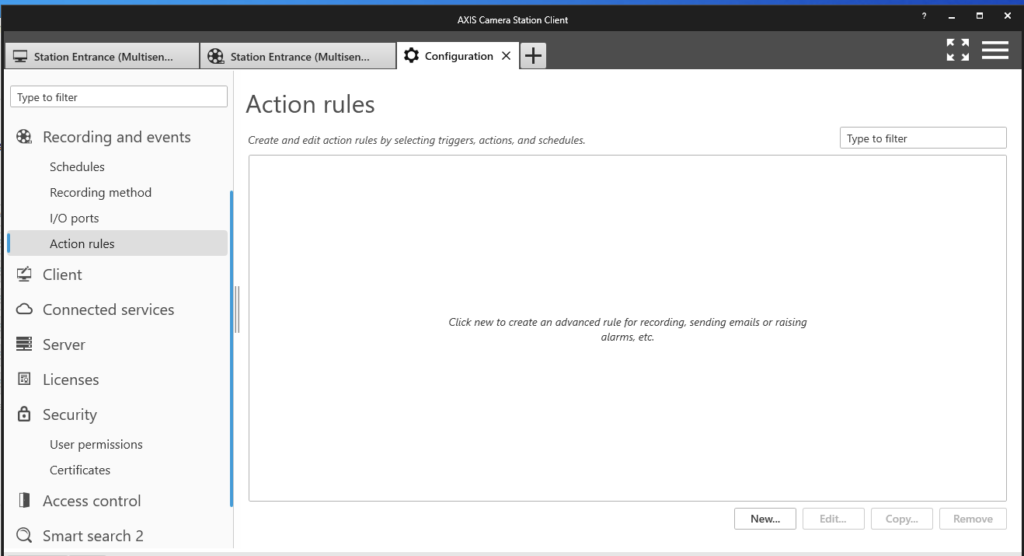
Step 2: In AXIS Camera Station, go to Configuration > Recording and Events > Action Rules
and click New.
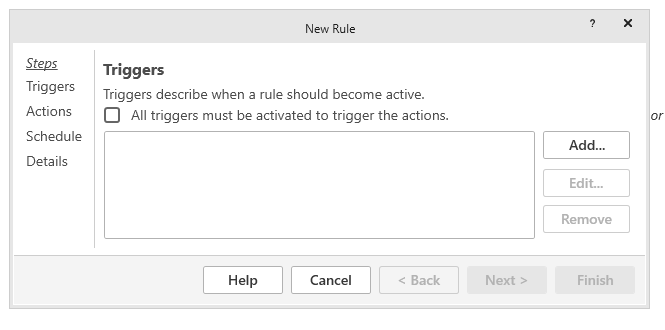
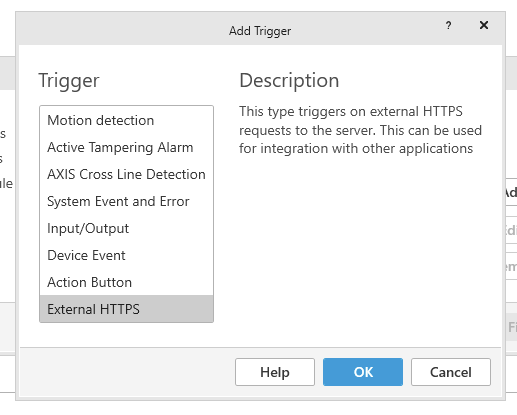
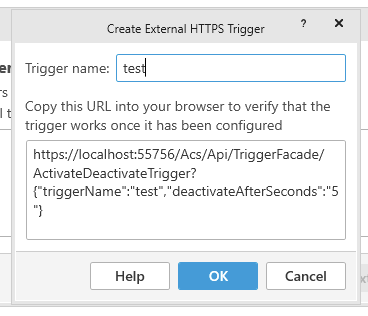
Step 3: Under the Triggers Step click Add > External HTTPS > OK
Step 4: Enter a Trigger Name, click OK > Next, and enter this trigger name in the corresponding
field for a 3D Sense Device under the Integrations Tab on the Triton Sync Dashboard.

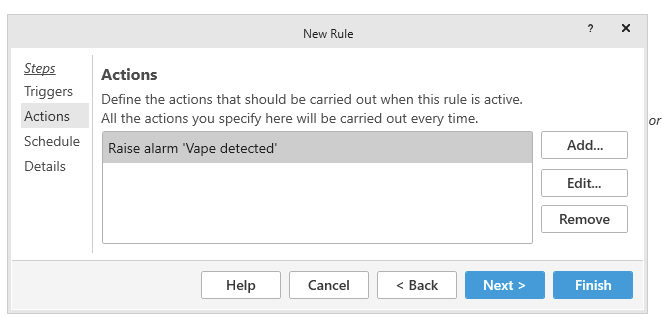
Step 5: Add any actions you would like to occur when this rule is triggered and click Next.
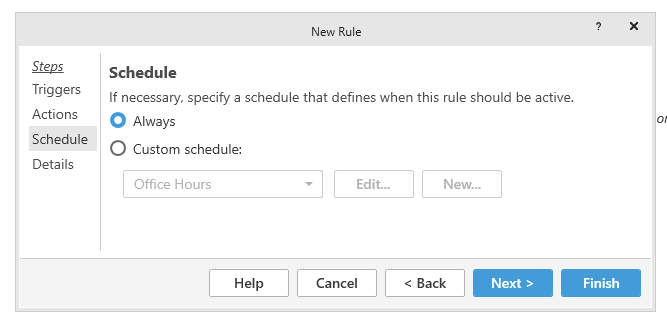
Step 6: Set any schedule you would like for this rule and click Next.
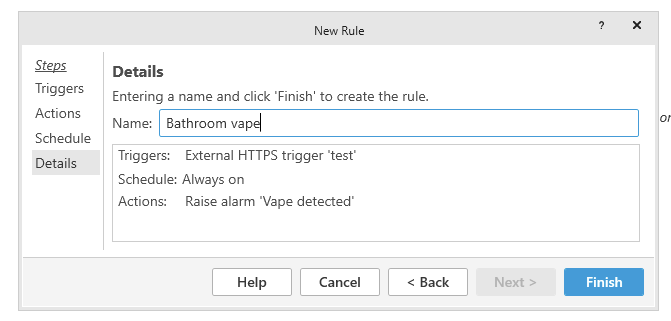
Step 7: Enter a name for the rule and click Finish.
Step 8: Repeat steps 2-8 for each 3D Sense Device on Triton Sync.
Step 9: Follow these instructions from Windows to create a local user account on your computer
Step 10: Enter the username and password of the new local user account into the corresponding
fields on the Triton Sync Dashboard.
Step 11: In AXIS Camera Station, go to Configuration > Security > User Permissions and click
Add…
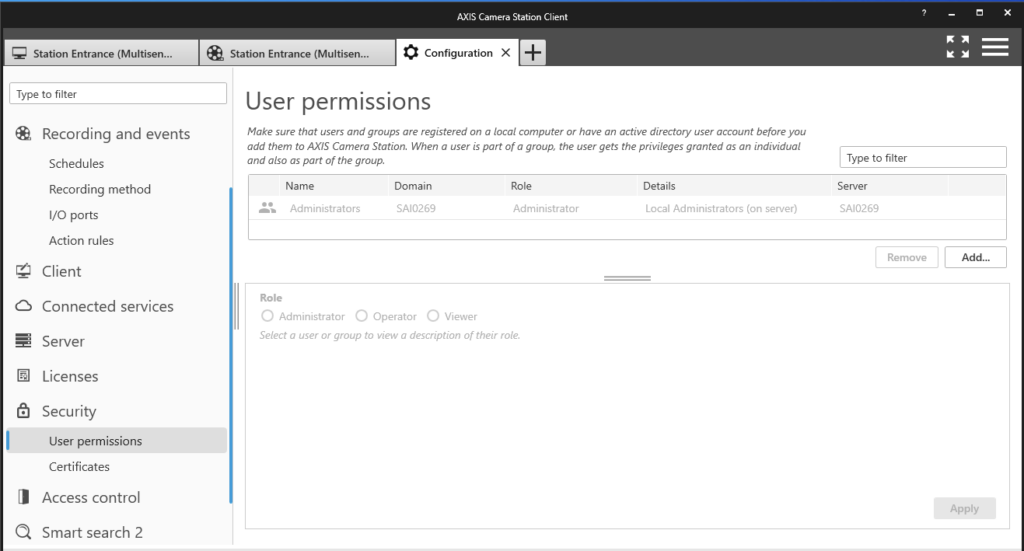
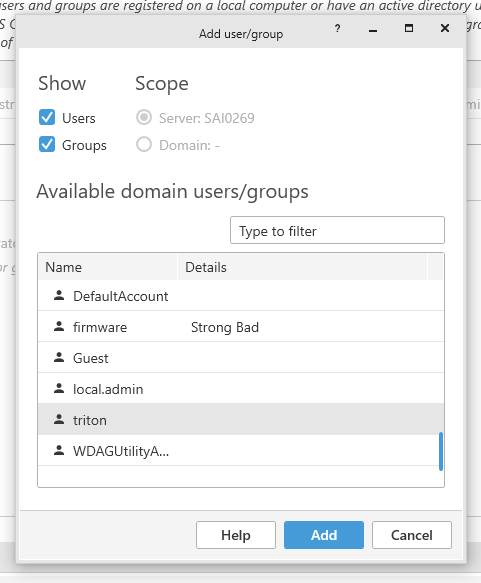
Step 12: Select the local user account that was just created and click Add.
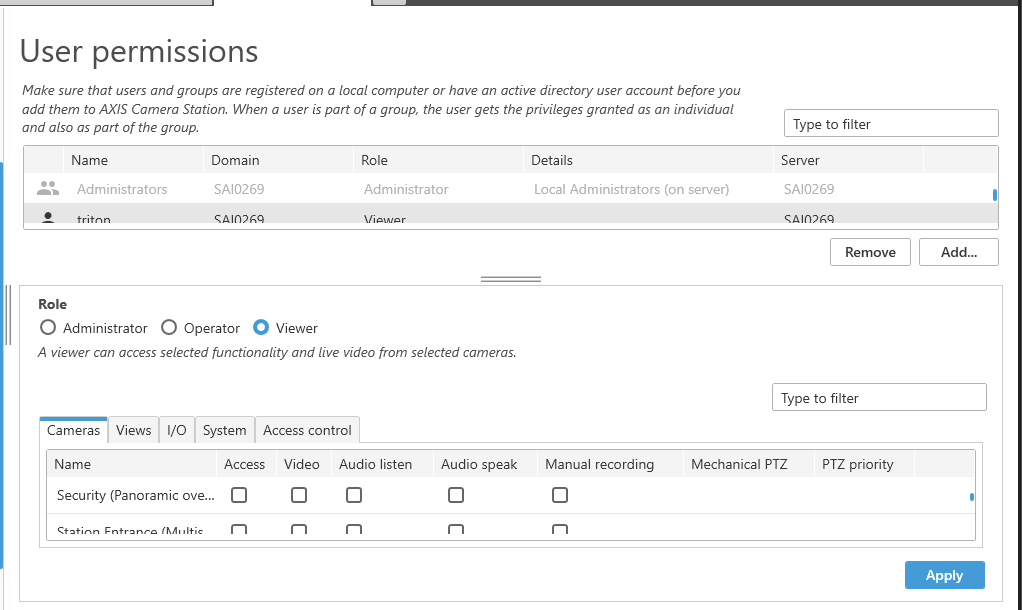
Step 13: Select Viewer for the Role and click Apply.
Your AXIS Camera Station System should now be integrated with Triton Sync. Feel free to contact Triton Support with further questions.


