Please note, this guide is for the Avigilon Alta Aware Cloud VMS. For the Avigilon Unity On-Premise VMS, refer to it’s integration guide here.
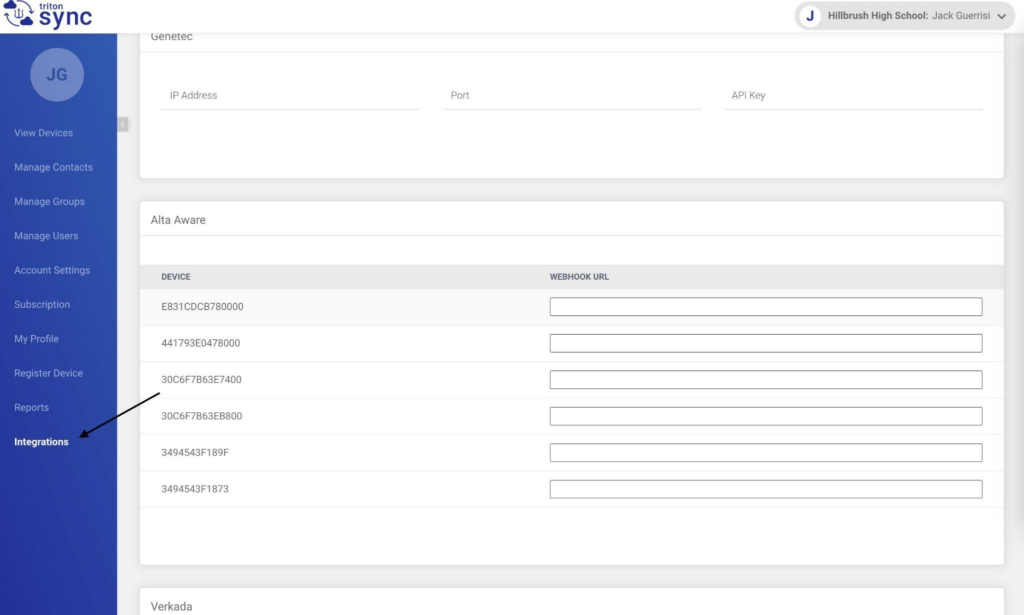
Step 1: Select the Integrations Tab on the left-hand navigation bar, and scroll down to the section labeled Alta Aware:
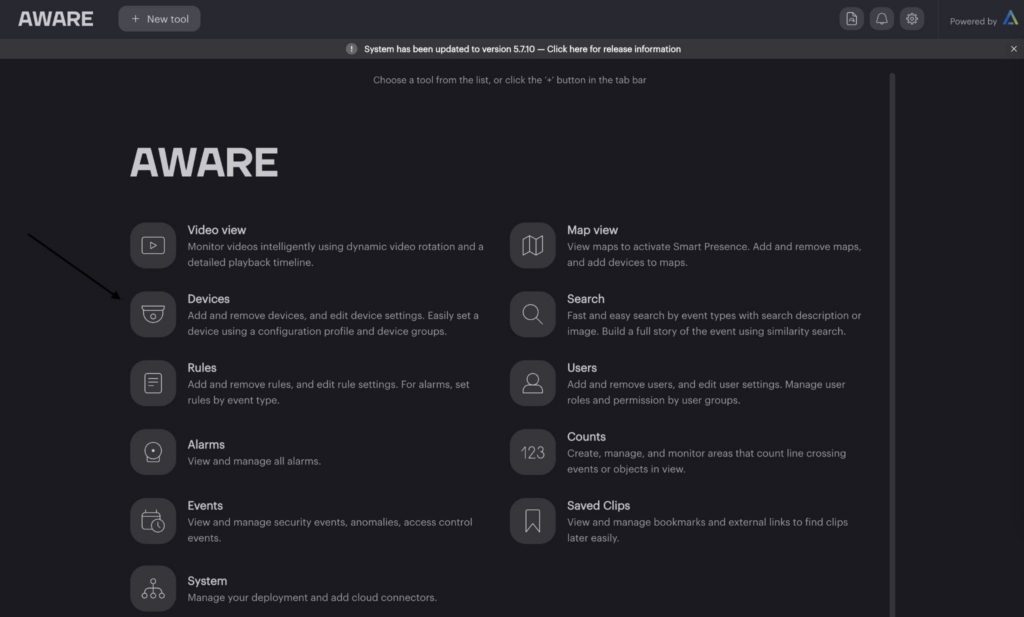
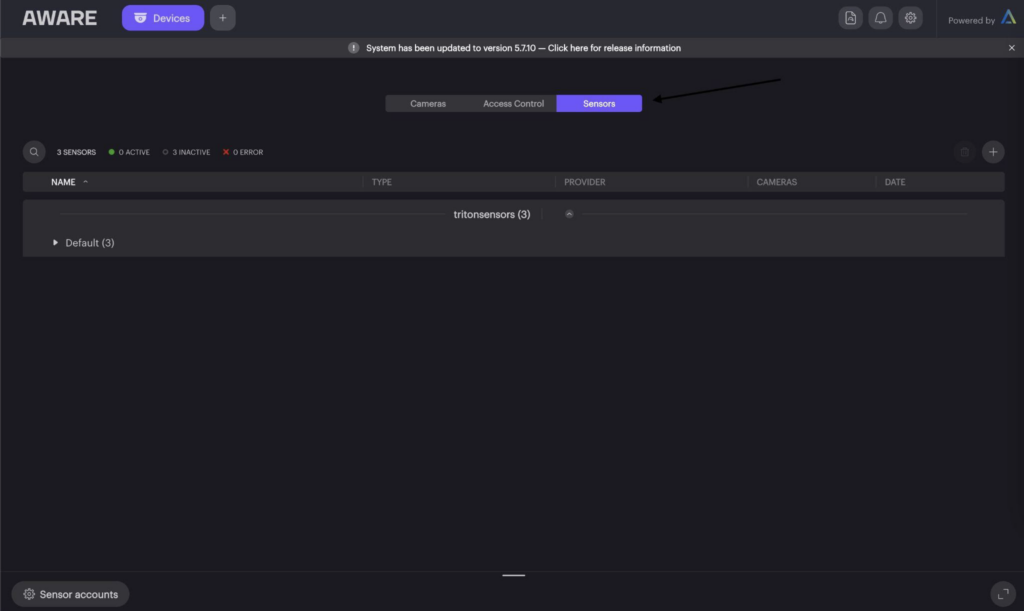
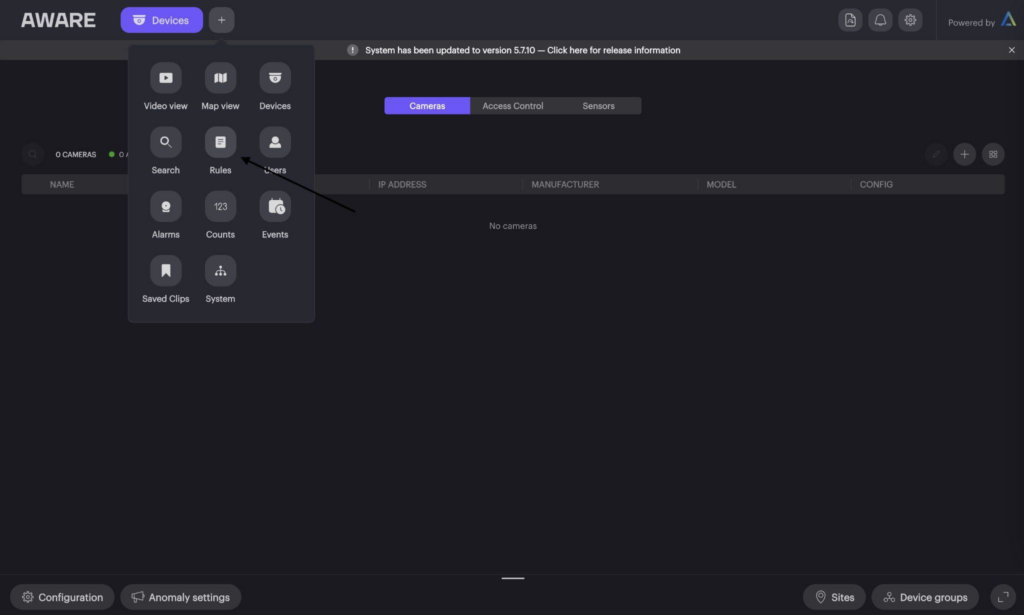
Step 2: From the Alta Aware Dashboard, select “Devices”, then select “Sensors”
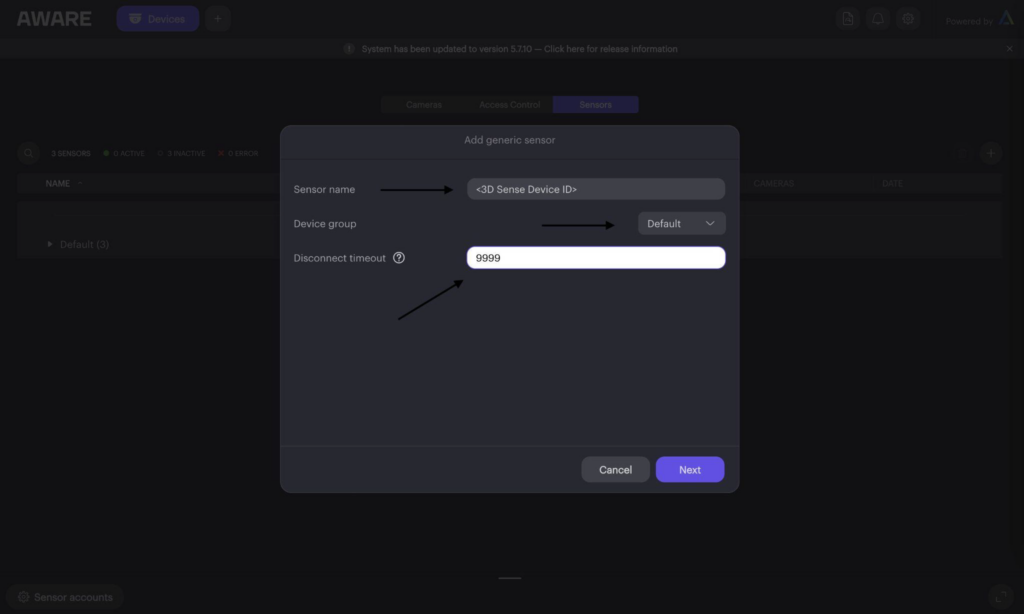
Step 3: For each 3D Sense Device, click “+”, click “Generic”, enter a name for your
sensor(preferably the Device ID on the side of each device), select “Default” for
device group, and set disconnect timeout to 9999
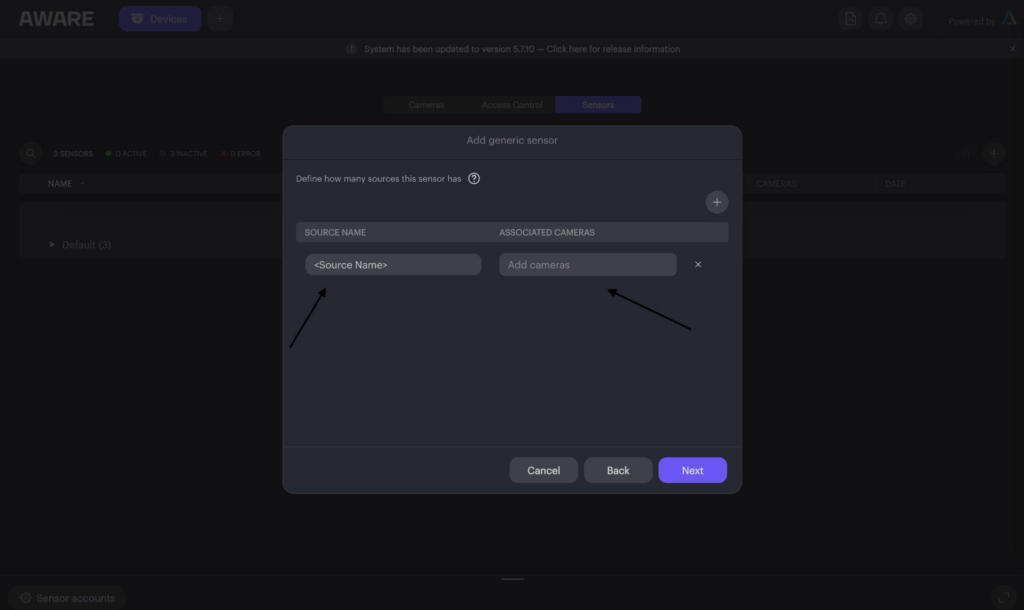
Step 4: Click “Next”, add a source name for this sensor, and add all the cameras
associated to that 3D Sense location to that source, click “Next”
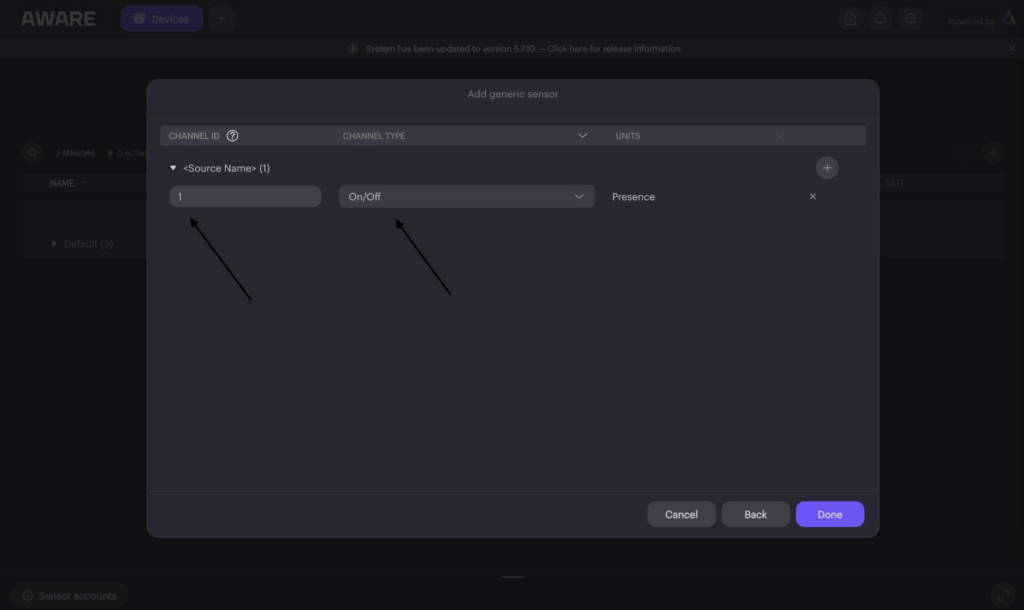
Step 5: Set “Channel ID” to 1, set “Channel Type” to “On/Off”, click “Done”:
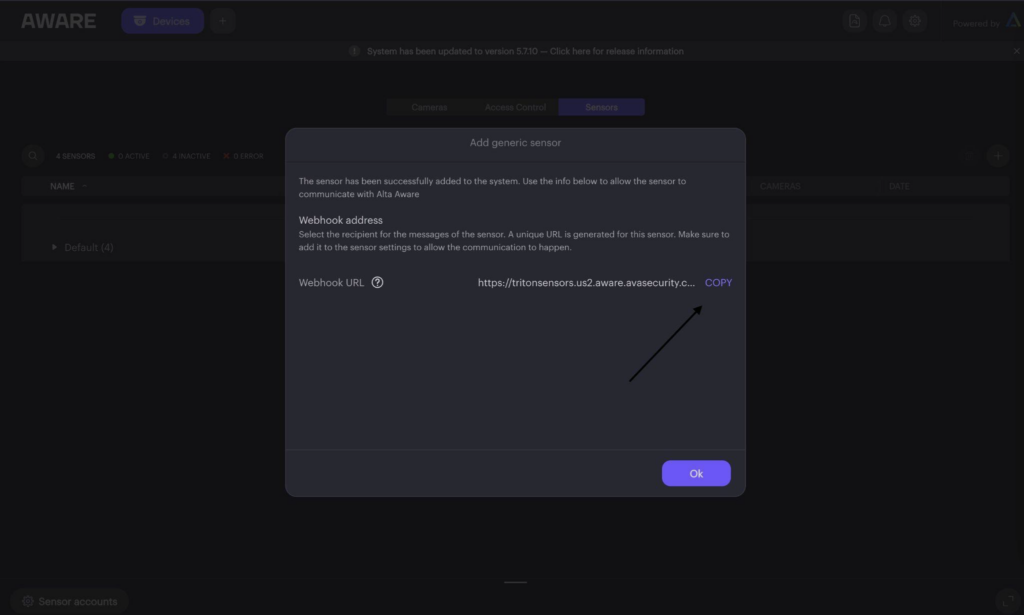
Step 6: Next, copy your Webhook URL associated to the device and input the Webhook
URL into the Webhook URL field on Triton Sync Dashboard to the corresponding
device:
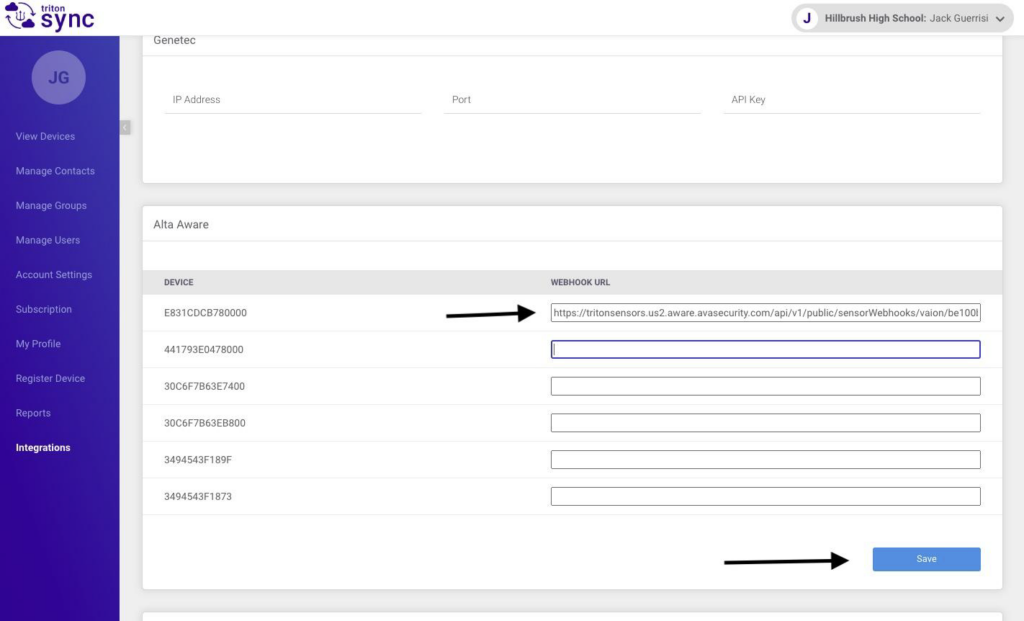
Step 7: Repeat steps 3-6 for all 3D Sense Devices, and click “Save”
Step 8:To set up a rule on Alta Aware, select “+”, then select “Rules”
Step 9: Click “+” on the right-hand side of the screen to create a new rule, name the rule,
select “Sensor”, set “Importance Level”, and click “Next”

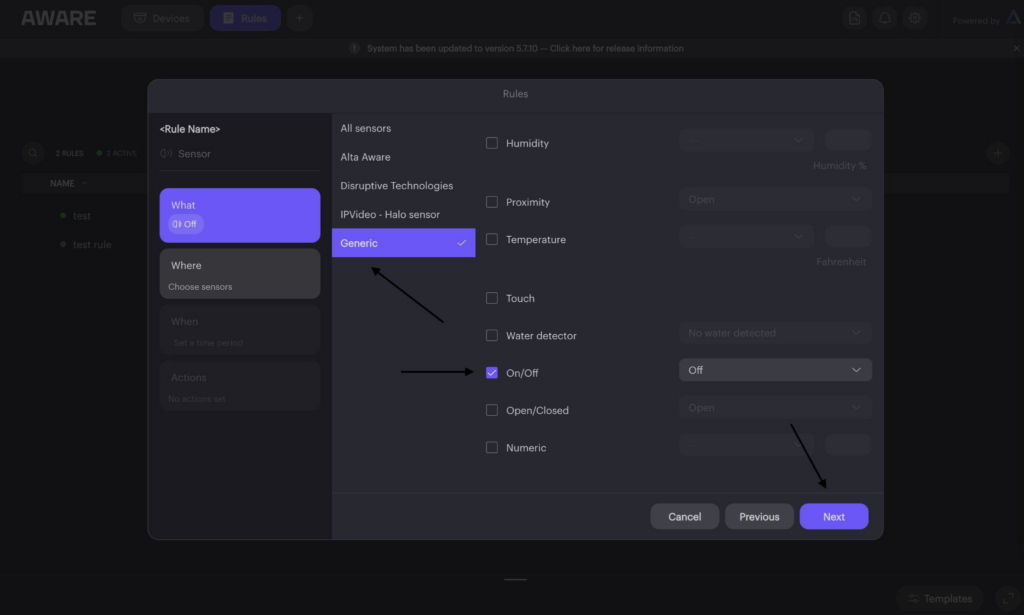
Step 10:Click “Generic”, select “On/Off”, click “Next”
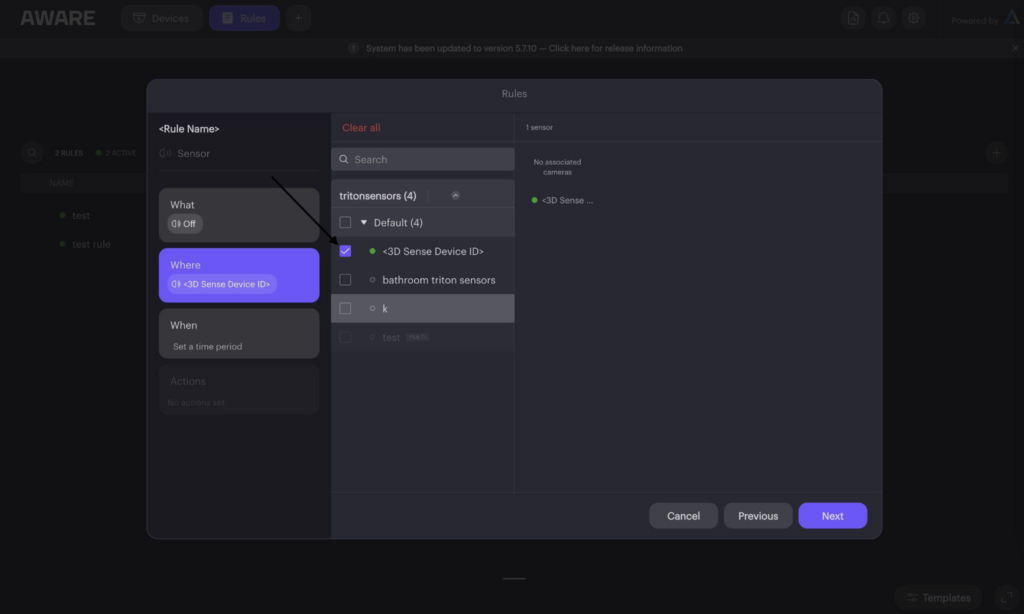
Step 11: Select all Triton Sensor Devices, and click “Next”
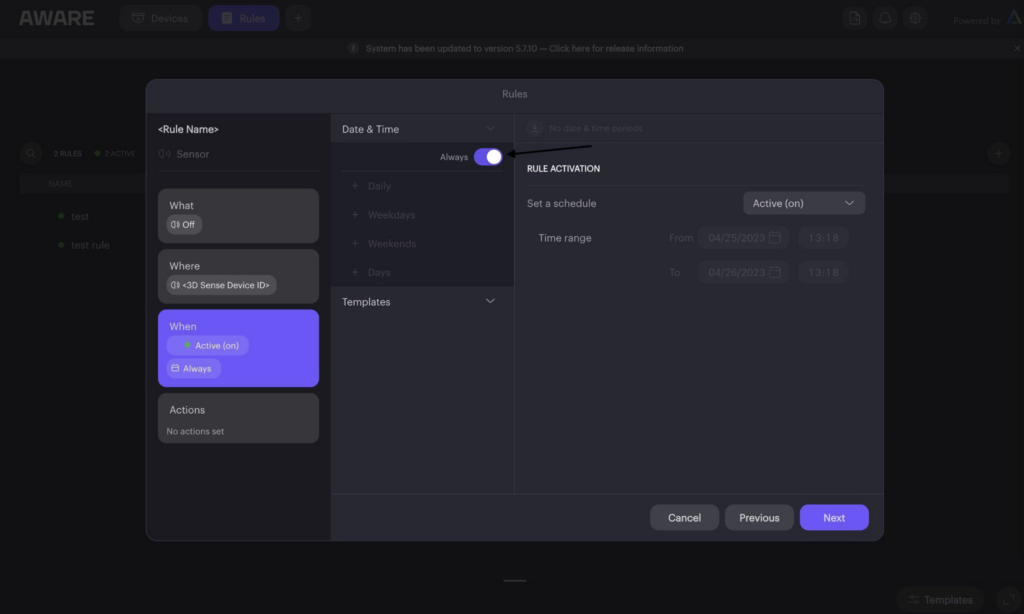
Step 12: Select “Always On”(or set a schedule), and click “Next”
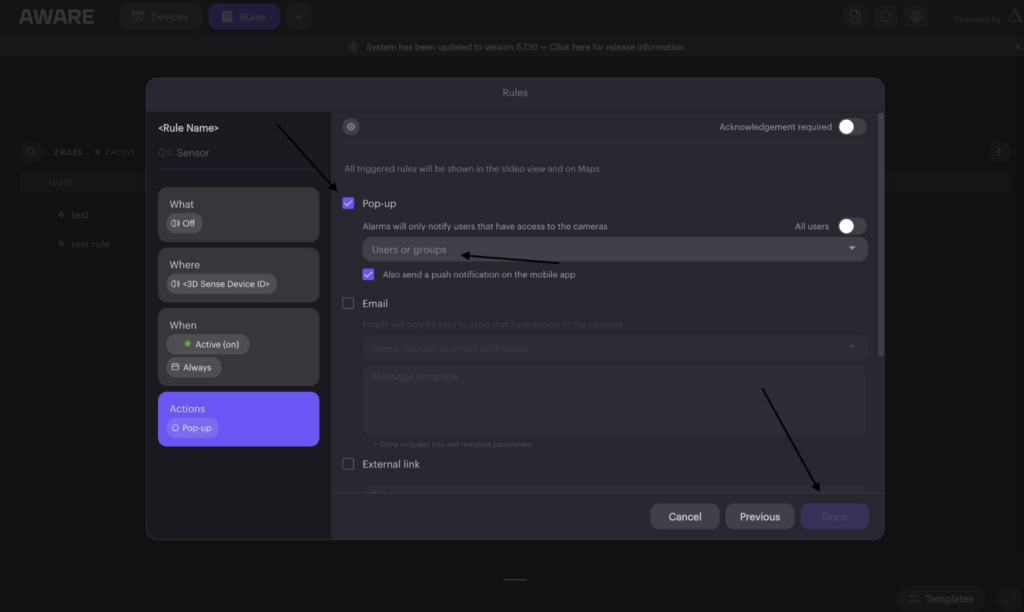
Step 13: Select the Pop-up action and set relevant users to be notified, and select any other
actions that you would like to be triggered, then select “Done”